Comprehensive Guide: Installing and Configuring SonarQube on Windows
In the realm of software development, ensuring code quality is paramount for delivering reliable and maintainable applications. SonarQube, an open-source platform, offers powerful code quality inspection capabilities. In this comprehensive guide, we’ll walk through the step-by-step process of installing and configuring SonarQube on a Windows system.
Step 1: Download and Install Oracle Java 17
Before installing SonarQube, ensure you have Java installed. Follow these steps:
- Download Oracle Java 17 from Oracle’s website.
- Run the downloaded installer and follow the installation wizard.
- Set the
JAVA_HOMEenvironment variable toC:\Program Files\Java\jdk-17\bin.
Step 2: Download and Install SonarQube
Now, let’s install SonarQube:
- Download the SonarQube zip file from SonarSource.
- Extract the contents of the zip file to
C:\sonarqube-10.4.1.88267. - Set the
SONAR_JAVA_PATHenvironment variable using CMD:
set "SONAR_JAVA_PATH=C:\Program Files\Java\jdk-17\bin\java.exe"Step 3: Start SonarQube
Start SonarQube using the following command in CMD:

Step 4: Access SonarQube Web Interface
- Open a web browser and navigate to
http://localhost:9000. - Log in with the default credentials (admin/admin).
- Follow the prompts to change the password.
Step 5: Install SonarScanner
SonarScanner allows you to analyze your projects for code quality. Here’s how to install it:
- Download SonarScanner CLI from SonarSource.
- Extract the contents to a directory, e.g.,
C:\sonar-scanner-5.0.1.3006-windows.

Step 6: Analyze Your Project
- Open CMD prompt.
- Run the SonarScanner command:
C:\sonar-scanner-5.0.1.3006-windows\bin\sonar-scanner.bat -D"sonar.projectKey=myproject" -D"sonar.sources=." -D"sonar.host.url=http://localhost:9000" -D"sonar.login=<your_token_here>"Replace myproject with your project key and <your_token_here> with your generated token from SonarQube.
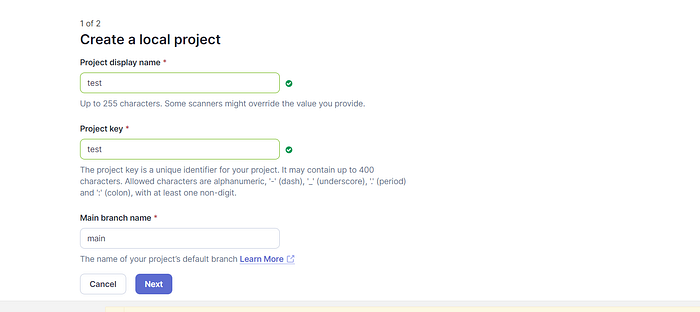
Step 7: Create and Analyze a Project in SonarQube
- Log in to SonarQube dashboard.
- Navigate to Projects tab > Create Project.

3. Set up the project using global settings.

4. Analyze your project locally using SonarScanner.
5 . Provide a token for authentication and execute the SonarScanner command.


Conclusion
Congratulations! You’ve successfully installed and configured SonarQube on your Windows system, integrated SonarScanner for code analysis, and analyzed your project for code quality. By following these steps, you’re on your way to improving the quality and maintainability of your software projects. Happy coding!
